 Kia Optima: Replacement
| 1. |
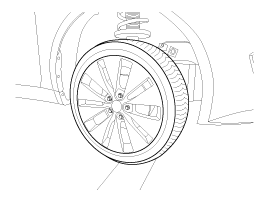
Remove the front wheel & tire.
Tightening torque:88.3
~ 107.9N.m(9.0 ~ 11.0kgf.m, 65.1 ~ 79.6lb-ft)
|

|
Be careful not to damage to the hub bolts when removing the front
wheel & tire. |
|
| 2. |
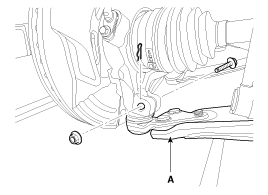
Loosen the bolt & nut and then
remove the lower arm (A).
Tightening torque:98.1
~ 117.7N.m(10.0 ~ 12.0kgf.m, 72.3 ~ 86.6lb-ft)
|

|
| 3. |
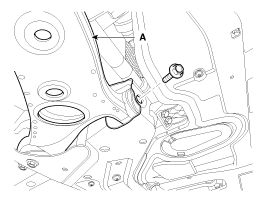
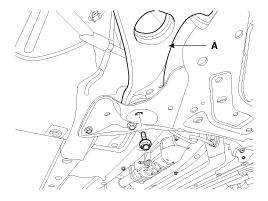
Loosen the bolts and nuts and
then remove the front lower arm (A).
Tightening torqueFront:
117.7 ~ 137.3N.m(12.0 ~ 14.0kgf.m, 86.8 ~ 101.3lb-ft)Rear:
137.3 ~ 156.9N.m(14.0 ~ 16.0kgf.m, 101.3 ~ 115.7lb-ft)
|


|
| 4. |
Installation is the reverse of
removal. |
1.
Check the bushing for wear and
deterioration.
2.
Check the front stabilizer bar
for deformation.
3.
Check the all bolts and nuts.
...
See also:
Description of ESC
Optimum driving safety now has a name : ESC, the Electronic Stability Control.
ESC recognizes critical driving conditions, such as panic reactions in dangerous
situations, and stabilizes the vehi ...
Seat belt restraint system
WARNING
For maximum restraint system protection, the seat belts must always be
used whenever the vehicle is moving.
Seat belts are most effective when seatbacks are in the upright position.
...
Opening the hood
1. Pull the release lever to unlatch the hood. The hood should pop open slightly.
WARNING
Open the hood after turning off the engine on a flat surface, shifting the shift
lever to the P(Park) p ...
 Kia Optima: Replacement
 Inspection


