 Kia Optima: Body Side Moldings. Repair procedures
Replacement
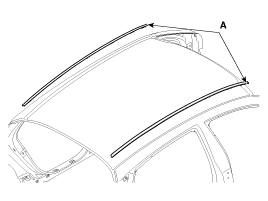
Roof Molding Replacement
| ŌĆó |
When prying with a flat-tip
screwdriver, wrap it with protective tape, and apply protective
tape around the related parts, to prevent damage. |
| ŌĆó |
Put on gloves to protect
your hands. |
| ŌĆó |
Take care not to scratch
the body surface. |
|
| 1. |
Using a screwdriver or remover,
remove the roof molding (A).
|
| 2. |
Installation is the reverse of
removal.
| ŌĆó
|
Replace any damaged
clips. |
|
|
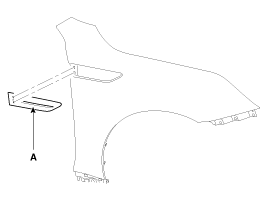
Fender Garnish Replacement
| ŌĆó |
When prying with a flat-tip
screwdriver, wrap it with protective tape, and apply protective
tape around the related parts, to prevent damage. |
| ŌĆó |
Put on gloves to protect
your hands. |
| ŌĆó |
Take care not to scratch
the body surface. |
|
| 1. |
Using a screwdriver or remover,
remove the fender garnish (A).
|
| 2. |
Installation is the reverse of
removal.
| ŌĆó
|
Replace any damaged
clips. |
|
|
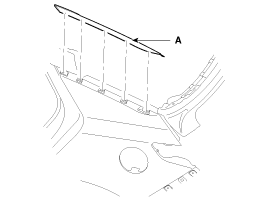
C Pillar Molding Replacement
| ŌĆó |
When prying with a flat-tip
screwdriver, wrap it with protective tape, and apply protective
tape around the related parts, to prevent damage. |
| ŌĆó |
Put on gloves to protect
your hands. |
| ŌĆó |
Take care not to scratch
the body surface. |
|
| 1. |
Using a screwdriver or remover,
remove the C pillar molding (A).
|
| 2. |
Installation is the reverse of
removal.
| ŌĆó
|
Replace any damaged
clips. |
|
|
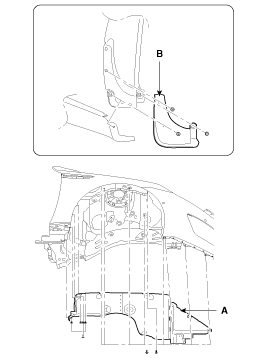
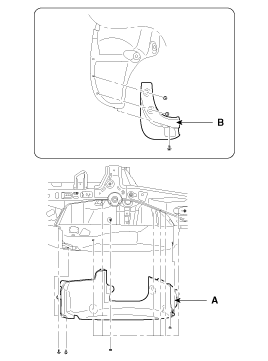
Front Wheel Guard And Mud Guard Replacement
| ŌĆó |
When prying with a flat-tip
screwdriver, wrap it with protective tape, and apply protective
tape around the related parts, to prevent damaged |
| ŌĆó |
Put on gloves to protect
your hands. |
| ŌĆó |
Take care not to scratch
the body surface. |
|
| 1. |
Remove the front tire. |
| 2. |
After loosening the mounting
clips and screws, then remove the front wheel guard (A), mud guard (B).
|
| 3. |
Installation is the reverse of
removal.
| ŌĆó
|
Replace any damaged
clips. |
|
|
Rear Wheel Guard And Mud Guard Replacement
| ŌĆó |
When prying with a flat-tip
screwdriver, wrap it with protective tape, and apply protective
tape around the related parts, to prevent damaged |
| ŌĆó |
Put on gloves to protect
your hands. |
| ŌĆó |
Take care not to scratch
the body surface. |
|
| 2. |
After loosening the mounting
clips and nut, then remove the rear wheel guard (A) and mud guard (B)
[RH]
![[LH]](images/books/1521/stfbd1088d.gif)
[LH]
|
| 3. |
Installation is the reverse of
removal.
| ŌĆó
|
Replace any damaged
clips. |
|
|
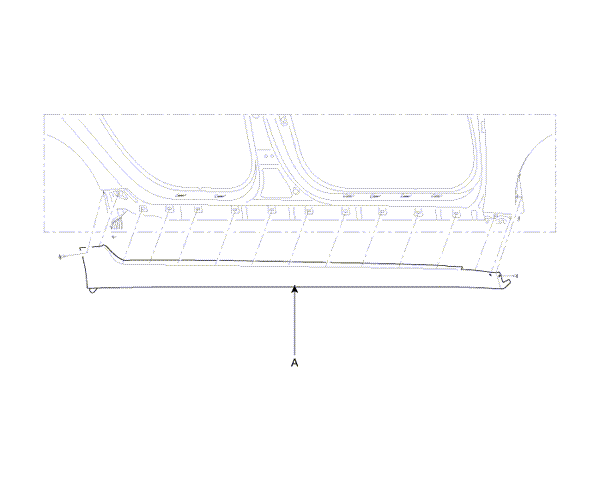
Side Sill Molding Replacement
| ŌĆó |
When prying with a flat-tip
screwdriver, wrap it with protective tape, and apply protective
tape around the related parts, to prevent damage. |
| ŌĆó |
Put on gloves to protect
your hands. |
| ŌĆó |
Take care not to scratch
the body surface. |
|
| 1. |
Loosen the mounting screws. |
| 2. |
Using a screwdriver or remover,
remove the side sill molding (A). |
| 3. |
Installation is the reverse of
removal.
| ŌĆó
|
Replace any damaged
clips |
|
|
Glass Adjustment
ŌĆó
Check the glass run channel
for damage or deterioration, and replace them if necessary.
...
Components
1. Roof molding [RH]
2. Roof molding [LH]
3. Movable glass
4. Cover [RH]
5. Wind deflector assembly
6. Front cover assembly
7. Panoramaroof frame assembly
...
 Adjustment
 Panoramaroof. Components and Components Location