 Kia Optima: Trunk Trim. Repair procedures
Replacement
| ŌĆó |
Put on gloves to protect
your hands. |
| ŌĆó |
Use a plastic panel removal
tool to remove interior trim pieces to protect from marring the
surface. |
| ŌĆó |
Take care not to bend
or scratch the trim and panels. |
|
| 1. |
Remove the trunk trim. |
| 2. |
Installation is the reverse of
removal.
| ŌĆó
|
Replace any damaged
clips. |
|
|
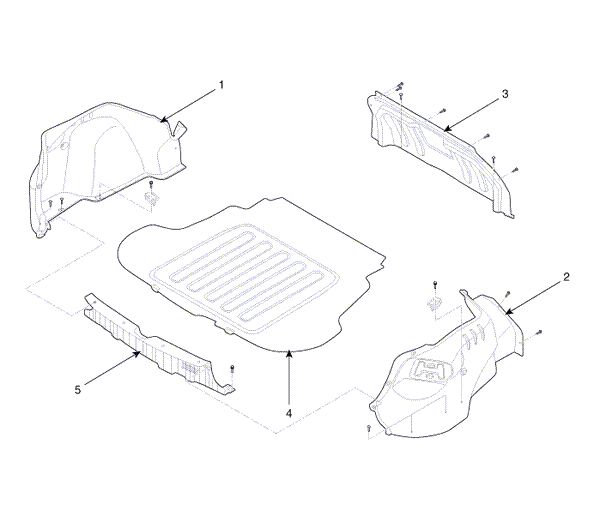
1. Luggage side trim [LH]
2. Luggage side trim [RH]
3. Partition lower trim
|
4. Luggage covering mat & board
5. Rear transverse trim
|
| ŌĆó |
Put on gloves to protect
your hands. |
| ŌĆó |
Use a plastic panel removal
tool to remove interior trim pieces to protect from marring the
surface. |
| ŌĆó |
Take care not to bend
or scratch the trim and panels. |
|
| 1. |
Remove the trunk trim. |
| 2. |
Installation is the reverse of
removal.
| ŌĆó
|
Replace any damaged
clips. |
|
|
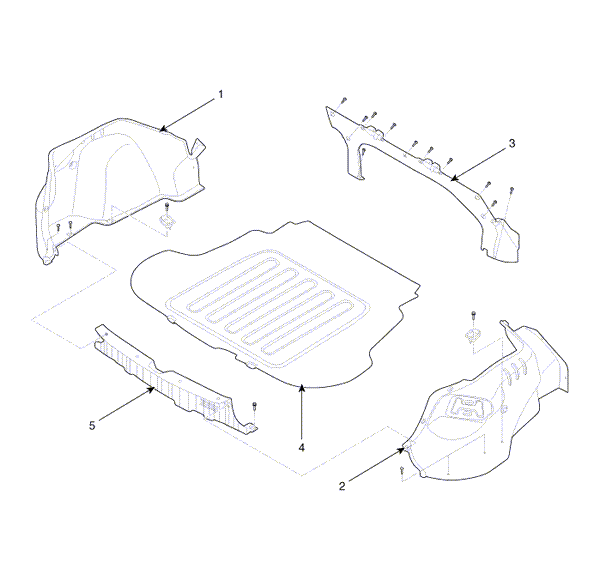
1. Luggage side trim [LH]
2. Luggage side trim [RH]
3. Partition lower trim
|
4. Luggage covering mat & board
5. Rear transverse trim
|
Replacement
Door Scuff Trim Replacement
ŌĆó
Put on gloves to protect
your hands.
ŌĆó
...
Components
1. Windshield side molding
2. Windshield glass
...
See also:
Engine Exhaust Gas Precautions
WARNING
Engine exhaust gases contain carbon monoxide (CO). Though colorless and odorless,
it is dangerous and could be lethal if inhaled. Follow the instructions below to
avoid CO poisoning. ...
Waxing
Wax the vehicle when water will no longer bead on the paint.
Always wash and dry the vehicle before waxing. Use good quality liquid or paste
wax, and follow the manufacturerŌĆÖs instructions. Wax a ...
Oil Capacity
2400cc 4-cyl. Engine
- Without filter change : 4.2 qts (4.0 liters)
- With filter change : 4.5 qts (4.3 liters)
2700cc V-6 Engine
- Without filter change : 4.75 qts (4.5 liters)
- With fi ...
 Interior Trim. Repair procedures
 Windshield Glass. Components and Components Location