 Kia Optima: Heater & A/C Control Unit(Manual). Repair procedures
Replacement
| 1. | Disconnect the negative (-) battery terminal. |
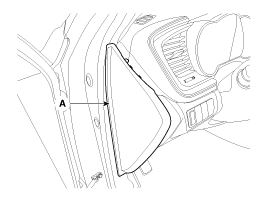
| 2. | Using the screwdriver, remove
the side cover (A).
|
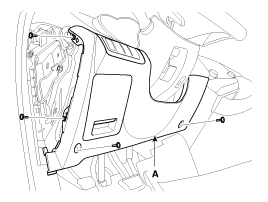
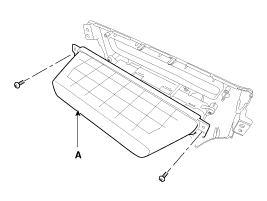
| 3. | Loosen the mounting screw and
then remove the crash pad lower cover (A).
|
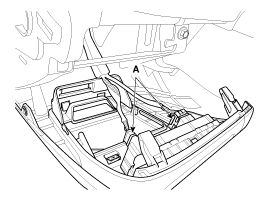
| 4. | Disconnect the connector (A),
and then remove the crash pad lower cover.
|
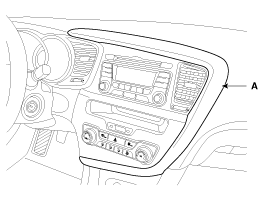
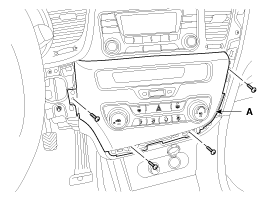
| 5. | Using the screwdriver, remove
the center garnish (A).
|
| 6. | Loosen the mounting screw and
then remove the blower & A/C controller (A).
|
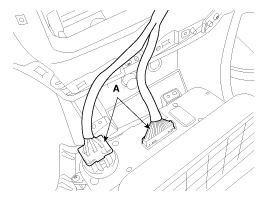
| 7. | Disconnect the center connectors
and then remove the blower & A/C controller (A).
|
| 8. | Loosen the mounting and then
remove the center fascia box (A).
|
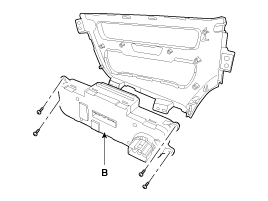
| 9. | Loosen the mounting screws and
then remove the blower & A/C controller (A).
|
| 10. | Installation is the reverse order of removal. |
 Components and Components Location
Components
Connector pin function
Connector
PIN NO.
Function
Connector
PIN No.
Function
Connector(A)
1 ...
 Heater & A/C Control Unit(Dual). Components and Components Location
Components
Control Panel
Connector pin function
Connector
PIN NO.
Function
Connector
PIN NO.
Function
...
See also:
Power Window Motor. Schematic Diagrams
Circuit Diagram
...
Wheel alignment and tire balance
The wheels on your vehicle were
aligned and balanced carefully at the
factory to give you the longest tire life
and best overall performance.
In most cases, you will not need to
have your whe ...
Front Wiper Motor. Components and Components Location
Component Location
1. Cap
2. Nut
3. Wiper arm & blade
4. Rivet
5. Cowl top cover
6. Bolt
7. Wiper motor & linkage assembly
...
Categories
Kia Optima Manuals
- Kia Optima DL3 2019-2026 Owners Manual
- Kia Optima DL3 2019-2026 Service and Repair Manual
- Kia Optima TF 2011-{2019} Owners Manual
- Kia Optima TF 2011-2026 Service Manual
- Kia Optima MS/Magentis 2000-2005 Owners Manual

Copyright ® www.kiopman.com 2026