 Kia Optima: Replacement
| 1. |
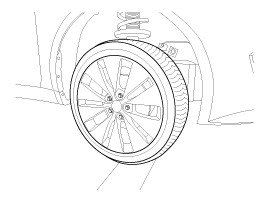
Remove the front wheel & tire.
Tightening torque :
88.3 ~ 107.9N.m (9.0 ~ 11.0kgf.m, 65.1 ~ 79.6lb-ft)
|
|
Be careful not to damage to the hub bolts when removing the front
wheel & tire. |
|
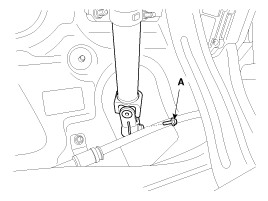
| 2. |
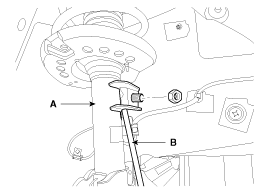
Disconnect the stabilizer link
(B) from the front strut assembly (A) after loosening the nut.
Tightening torque :
98.1 ~ 117.7N.m (10.0 ~ 12.0kgf.m, 72.3 ~ 86.8lb-ft)
|
|
| 3. |
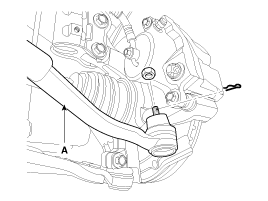
Remove the split pin and castle
nut and then disconnect the tie-rod end (A) from the front knuckle.
Tightening torque :
34.3 ~ 44.1N.m(3.5 ~ 4.5kgf.m, 25.7 ~ 32.5lb-ft)
|
|
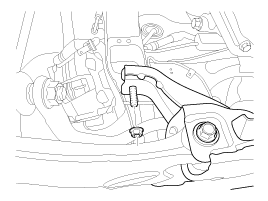
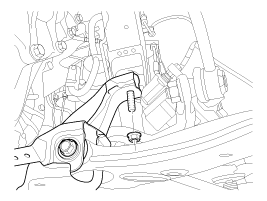
| 4. |
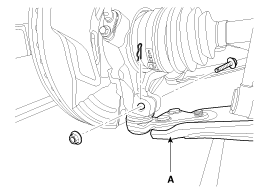
Loosen the bolt & nut and then
remove the lower arm (A).
Tightening torque :
98.1 ~ 117.7N.m (10.0 ~ 12.0kgf.m, 72.3 ~ 86.8lb-ft)
|
|
| 5. |
Loosen the bolt (A) and then
disconnect the universal joint assembly from the pinion of the steering
gear box.
Tightening torque :29.4
~ 34.3N.m (3.0 ~ 3.5kgf.m, 21.7 ~ 25.7lb-ft)
|
| ŌĆó
|
Keep in the neutral-range
to prevent damage of the clock spring inner cable when you
handle the steering wheel. |
| ŌĆó
|
Do not use the
bolt again. |
|
|
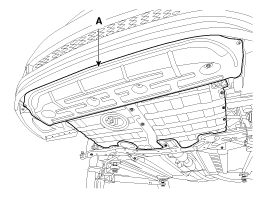
| 6. |
Remove the under cover (A).
|
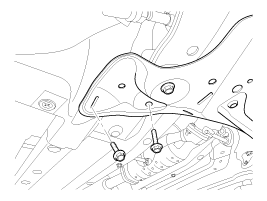
| 7. |
Loosen the bolt (A) & nut (B)
and then remove the roll rod stopper.
Tightening torque :
107.9 ~ 127.5N.m (11.0 ~ 13.0kgf.m, 79.6 ~ 94.0lb-ft)
|
|
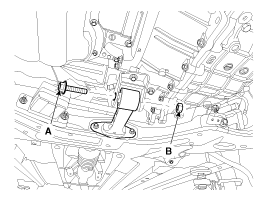
| 8. |
Disconnect the muffler rubber
hanger (A).
|
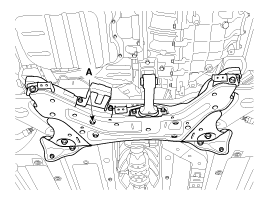
| 9. |
Loosen the bolts & nuts and then
remove the sub frame (A).
Tightening torqueSub frame
mounting bolts & nuts:
156.9 ~ 176.5N.m (16.0 ~ 18.0kgf.m, 115.7 ~ 130.2lb-ft)Sub frame
stay bolts & nuts:
44.1 ~ 58.8N.m (4.5 ~ 6.0kgf.m, 32.5 ~ 43.4lb-ft)
|
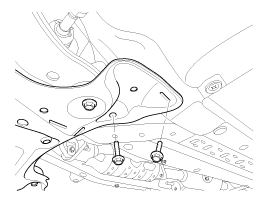
|
| 10. |
Remove the stabilizer bar. |
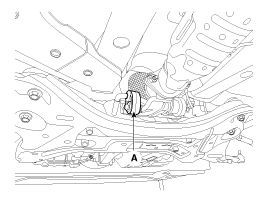
| 11. |
Loosen the bolt and then remove
the steering gear box (A).
Tightening torque :
88.3 ~ 107.9N.m (9.0 ~ 11.0kgf.m, 65.1 ~ 79.6lb-ft)
|
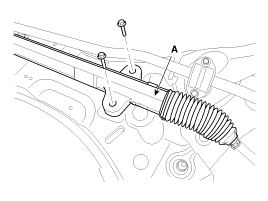
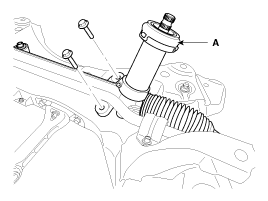
|
| 12. |
Installation is the reverse of
the removal. |
1.
Remove the dust packing & cap
(A) from the pinion housing.
2.
Loosen the lock nut and then
remove the tie rod end (B) and lock nut (A) from the tie rod ...
See also:
Child seat anchorage position
For small children and babies, the use of a child seat or infant seat is strongly
recommended. This child seat or infant seat should be of appropriate size for the
child and should be installed in ...
Removal
Room Lamp
1.
Disconnect the negative(-) battery
terminal.
2.
Carefully remove the lamp lens
(A) from the room lamp with a flat-tip screwdriver.
...
Side Impact Sensor (SIS). Description and Operation
Description
Side Impact Sensor (SIS) system consists of two P-SIS which are installed at each
center of the front door module (LH and RH) and two SIS which are installed at each
center pillar nea ...

 Disassembly