 Kia Optima: Repair
procedures
Kia Optima: Repair
procedures
On-vehicle Inspection
|
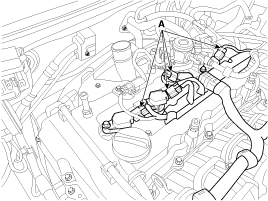
1. |
Disconnect the ignition coil connectors (A).
|
|
2. |
Remove the ignition coils (A).
|
|
3. |
Using a spark plug socket, remove the spark plug. |
|
4. |
Install the spark plug to the ignition coil. |
|
5. |
Ground the spark plug to the engine.

|
|
6. |
Check if spark occurs while engine is being cranked.
|
To prevent fuel being injected from injectors
while the engine is being cranked, disconnect the injector connector. Crank the engine for no more than 5 ~ 10
seconds. |
|
|
7. |
Inspect all the spark plugs. |
|
8. |
Using a spark plug socket, install the spark plug. |
|
9. |
Install the ignition coil. |
|
10. |
Reconnect the ignition coil connector. |

Inspect Spark Plug
|
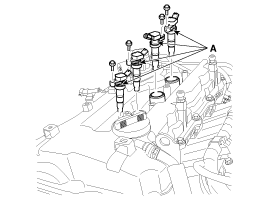
1. |
Disconnect the ignition coil connectors (A).
|
|
2. |
Remove the ignition coils (A).
|
|
3. |
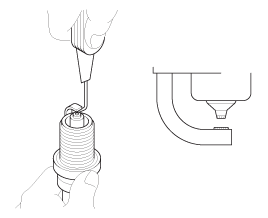
Using a spark plug socket, remove the spark plug.
|
Be careful that no contaminates enter through
the spark plug holes. |
|
|
4. |
Inspect the electrodes (A) and ceramic insulator
(B).
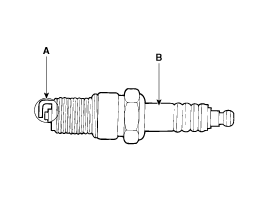
Inspection Of Electrodes
Condition
|
Dark deposits
|
White deposits
|
Description
|
|
|
- |
Advanced ignition timing |
|
- |
Insufficient plug tightening torque |
|
|
|
5. |
Check the electrode gap (A).
StandardUnleaded : 0.7 ~0.8 mm (0.0276 ~ 0.0315 in.)
|
|
Inspect Ignition Coil
|
1. |
Measure the primary coil resistance between terminals
(+) and (-).
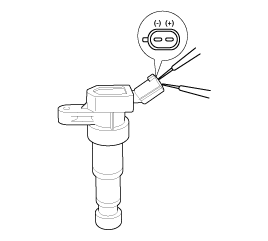
Standard value:
0.62Ω ┬▒ 10%
|
|
Description
Ignition timing is controlled by the electronic control ignition
timing system. The standard reference ignition timing data for the engine operating
conditions are preprogrammed in ...
1.
Disconnect the ignition coil connectors (A).
2.
Remove the ignition coils (A).
Tightening torque
:3.9 ~ 5.9N.m (0.4 ~ 0.6kgf.m, 2. ...
See also:
Starter
Relay. Repair procedures
Inspection
1.
Remove the fuse box cover.
2.
Remove the starter relay (A).
3.
Using an ohmmeter, check that there is continuit ...
Smooth cornering
Avoid braking or gear changing in corners, especially when roads are wet. Ideally,
corners should always be taken under gentle acceleration. If you follow these suggestions,
tire wear will be he ...
Tire terminology and definitions
Air Pressure: The amount of air
inside the tire pressing outward on
the tire. Air pressure is expressed in
pounds per square inch (psi) or kilopascal
(kPa).
Accessory Weight: This means the
...
 Description
and Operation
Description
and Operation Removal and Installation