 Kia Optima: Removal
| 1. | Disconnect the negative (-) battery terminal. |
| 2. | Remove the front bumper. (Refer to the BD group - "Front bumper") |
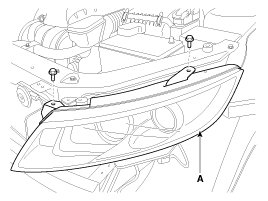
| 3. | Loosening the head lamp mounting
bolts (A) (2EA) and disconnect the head lamp connector (B). Then, remove the head lamp assembly (C).
|
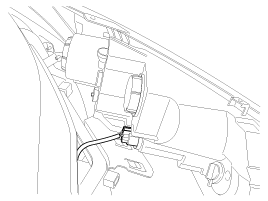
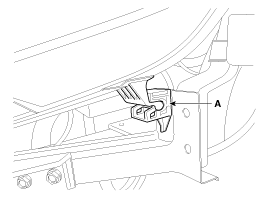
| 4. | In case of HID type, disconnect
the head lamp leveling actuator connector (A).
|
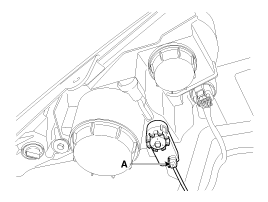
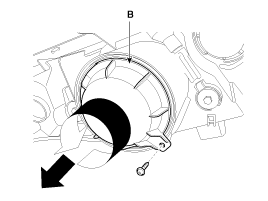
| 5. | Remove the dust caps from the
head lamp assembly after turning in the counter clock-wise direction. A : Head Lamp (High) Cap B : Head Lamp (Low) Cap
|

 Inspection
1.
Check-points upon head lamp failure
(HID)
(1)
Check the battery voltage.
(Low beam will be on when the battery voltage above 9V.)
(2)
...
 Installation
1.
Install the head lamp bulbs.
2.
Connect the connectors.
3.
Install the head lamp bolts (2EA).
4.
Connect the negative (-) battery
termi ...
See also:
Glove Box
To open the glove box door, pull the latch toward you. The glove box door can
be locked (and unlocked) with the vehicle key.
WARNING
To reduce the risk of injury in case of an accident or s ...
Replacement
1.
Disconnect the negative (-) battery
terminal.
2.
Remove the crash pad.(Refer
to BD group - "Crash Pad")
3.
Disconnect the Intake actu ...
Injector. Troubleshooting
Signal Waveform
...
Categories
Kia Optima Manuals
- Kia Optima DL3 2019-2026 Owners Manual
- Kia Optima DL3 2019-2026 Service and Repair Manual
- Kia Optima TF 2011-{2019} Owners Manual
- Kia Optima TF 2011-2026 Service Manual
- Kia Optima MS/Magentis 2000-2005 Owners Manual

Copyright ® www.kiopman.com 2026