 Kia Optima: Removal
| ŌĆó |
Take care not to scratch
the center fascia panel and related parts. |
| ŌĆó |
Eject all the disc before
removing the audio unit to prevent damaging the CD player's load
mechanism. |
|
| 1. |
Disconnect the negative (-) battery
terminal. |
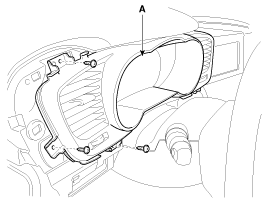
| 2. |
Using a screwdriver or remover,
remove the crash pad garnish RH (A).
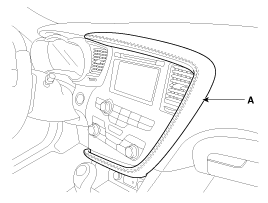
|
Apply the protective tapes to crash pad garnish and its related
parts. |
|
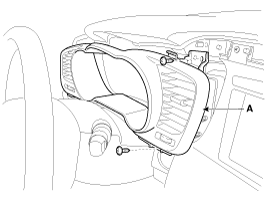
| 3. |
Using a screwdriver or remover,
remove the crash pad side cover (A).
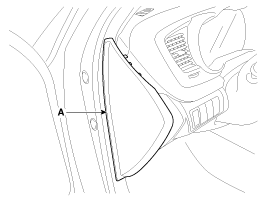
|
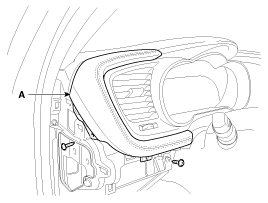
| 4. |
After loosening the crash pad
lower panel mounting screws, then remove the lower panel (A).
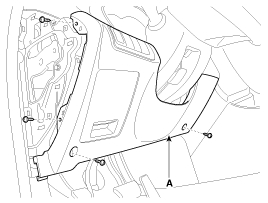
|
| 5. |
Remove the switch connector (A)
and SSB connector (B) from crash pad lower panel.
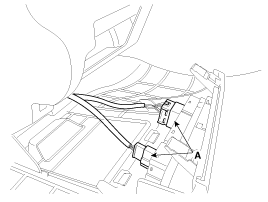
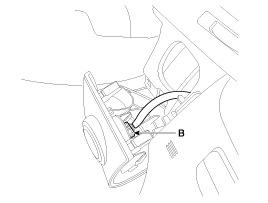
|
| 6. |
Remove the crash pad garnish
LH (A) after removing the screws.
|
| 7. |
Remove the instrument cluster
fascia panel (A) after loosening the screws.
|
| 8. |
Remove the center fascia lower
panel (A) after loosening the screws.
|
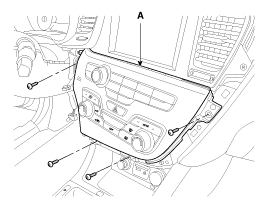
| 9. |
Remove the connectors (A) and
hose (B).
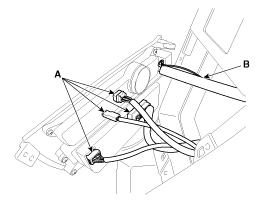
|
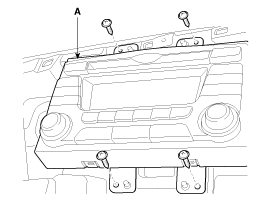
| 10. |
Remove the center fascia upper
panel (A) after loosening the screws.
|
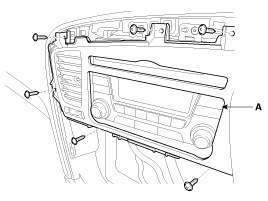
| 11. |
Remove the audio assembly (A)
after loosening the mounting screws.
|
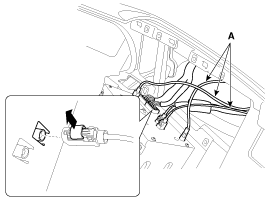
| 12. |
Disconnect the audio connectors
and cable (A), then remove the audio unit completely.
|
Lift the connector locking clip to the arrow direction, disconnect
the connector. When assembling, install the connector and connector
locking clip tightly.
|
|
If the CD does not eject, do not attempt to remove it because the
audio unit may be damaged.Contact an authorized dealership for assistance. |
|
-
Do not work in a dusty
or dirty place.
-
Do not touch the circuit
board with ...
See also:
To Defrost Outside Windshield
1. Set temperature to the extreme hot (25┬░C~32┬░C) position.
2. Set the fan speed to the or
position.
3. Press the defrost button ().
4. The air conditioning will be turned on according to th ...
Instrument Cluster. Schematic Diagrams
Circuit Diagram
...
For best battery service
Keep the battery securely mounted.
Keep the battery top clean and dry.
Keep the terminals and connections
clean, tight, and coated with petroleum
jelly or terminal grease.
Rinse any ...

 Disassembly