 Kia Optima: Removal
| ŌĆó |
Put on gloves to protect
your hands. |
| ŌĆó |
Be careful not to damage
the painted surface. |
|
| 1. |
Remove the following items.
| A. |
Roof molding (Refer
to the BD group- "Panoramaroof")
|
| B. |
Rear seat (Refer to
the BD group- "Rear Seat")
|
| C. |
Rear pillar trim (Refer
to the BD group- "Interior Trim")
|
| D. |
Package tray trim (Refer
to the BD group- "Interior Trim")
|
| E. |
Rear window glass heater
connector (Refer to BE group - "Rear window defogger")
|
|
| 2. |
Spread the WD-40 on the side
of rear window glass. |
| 3. |
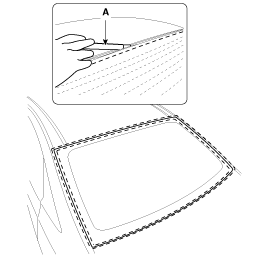
Cut out the adhesive using the
cutter (A).
| ŌĆó
|
Please use the
cutter with a blade length between 8-12 inches. |
|

|
| 4. |
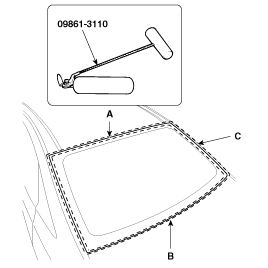
Enough on the upper (A) and lower
(B) side (C) of rear window glass. and then cut out the adhesive using the
cutter tool (09861-31100).

|
| 5. |
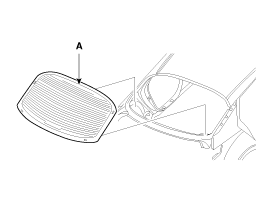
Remove the rear window glass
(A).
| ŌĆó
|
When removing
and installing the rear window glass, an assistant is necessary. |
|

|
1.
With a knife, scrape the old
adhesive smooth to a thickness of about 2mm (0.08 in.) on the bonding surface
around the entire rear window glass opening flange :
A.
D ...
See also:
Installation
1.
Installation is reverse of removal.
Be careful of fuel pump direction (Refer
to the groo ...
Components and Components Location
Component Location
1. Driver power window switch
2. Door lock switch
3. BCM (Body Control Module)
4. Front door lock actuator
5. Rear door lock actuator
6. Tru ...
Description and Operation
Warning Lamp Activation
Warning Lamp Behavior after Ignition
On
As soon as the operating voltage is applied to the SRSCM ignition input, the SRSCM
activates the warning lamp for a ...
 Kia Optima: Removal
 Installation


