 Kia Optima: Rear Seat. Repair procedures
Replacement
Seat Assembly Replacement
| 1. |
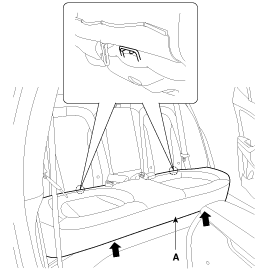
Remove the rear seat cushion
(A).
|
| 2. |
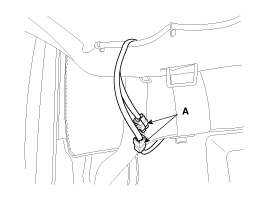
Disconnect the rear seat heater
connectors (A).
|
| 3. |
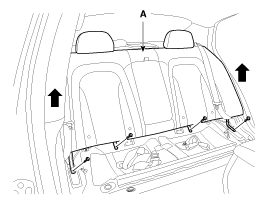
After loosening the mounting
bolts, then remove the rear seat back (A).
Tightening torque :16.7
~ 25.5N.m (1.7 ~ 2.6kgf.m, 12.3~18.8lb-ft)
|
|
| 4. |
Installation is the reverse of
removal.
| ŌĆó
|
Make sure the
connector is plugged in properly. |
|
|
Rear Seat Back Cover Replacement
| ŌĆó |
When prying with a flat-tip
screwdriver, wrap it with protective tape, and apply protective
tape around the related parts, to prevent damage. |
| ŌĆó |
Put on gloves to protect
your hands. |
|
| 1. |
Remove the rear seat assembly. |
| 2. |
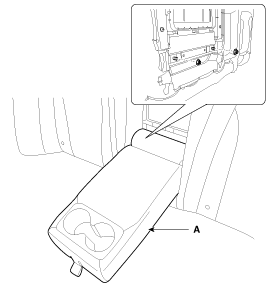
After loosening the mounting
nuts, then remove the rear back armrest (A).
|
| 3. |
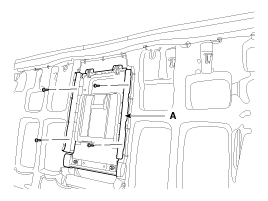
After loosening the mounting
screws, then remove the rear back armrest board (A),
|
| 4. |
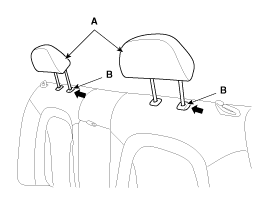
Push the lock pin (B), remove
the headrest (A).
|
| 5. |
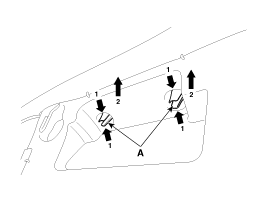
Pull out the headrest guides
(A) while pinching the end of the guides, and remove them.
|
| 6. |
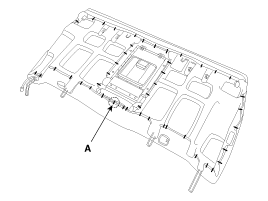
Remove the hog-ring clips (A).
|
| 7. |
Disconnect the hog-ring clips
(B) on the rear of seat back, remove the seat back cover (A).
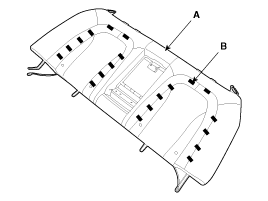
|
| 8. |
Installation is the reverse of
removal.
| ŌĆó
|
To prevent wrinkles,
make sure the material is stretched evenly over the cover
(B) before securing the hog-ring clips (A). |
| ŌĆó
|
Replace the hog-ring
clips with new ones using special tool [C (09880-4F000)]. |
|
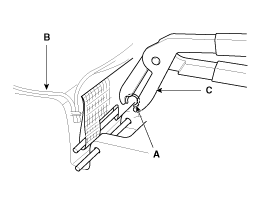
|
Rear Seat Cushion Cover Replacement
| ŌĆó |
When prying with a flat-tip
screwdriver, wrap it with protective tape, and apply protective
tape around the related parts, to prevent damage. |
| ŌĆó |
Put on gloves to protect
your hands. |
|
| 1. |
Remove the rear seat cushion. |
| 2. |
Remove the hog-ring clips (A).
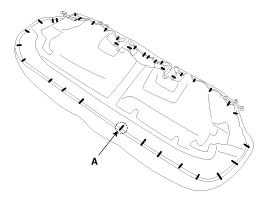
|
| 3. |
Disconnect the hog-ring clips
(B) on the rear of seat cushion, remove the seat cushion cover (A).
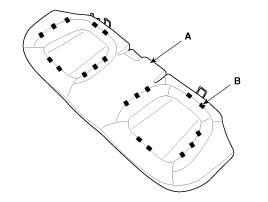
|
| 4. |
Installation is the reverse of
removal.
| ŌĆó
|
To prevent wrinkles,
make sure the material is stretched evenly over the cover
(B) before securing the hog-ring clips (A). |
| ŌĆó
|
Replace the hog-ring
clips with new ones using special tool [C (09880-4F000)]. |
|

|
Rear Back Armrest Replacement
| 1. |
Remove the rear seat back assembly. |
| 2. |
Loosen the rear back armrest
mounting nuts.
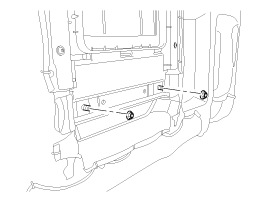
|
| 3. |
Remove the rear back armrest
(A).
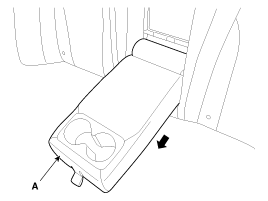
|
| 4. |
Installation is the reverse of
removal. |
1. Headrest
2. Headrest guide
3. Rear side cover
4. Rear side frame assembly
5. Rear seat back cover
6. Rear back armrest
7. Rear seat cushion cover
8. Rear ...
See also:
Removal
1.
Disconnect the negative(-) battery
terminal.
2.
Remove the rear seat.(Refer
to the BD group - "Rear seat")
3.
Remove the package tray ...
Inspection
1.
Turn ignition switch OFF.
2.
Disconnect the oil temperature
sensor connector.
3.
Measure resistance between sensor
signal terminal and sensor g ...
Power Seat Control Switch. Schematic Diagrams
Circuit Diagram
...
 Kia Optima: Rear Seat. Repair procedures
 Components - 2 [ Seat folding ]
 Seat Belt


