 Kia Optima: Rear Bumper. Repair procedures
Replacement
| ŌĆó |
Use a plastic panel removal
tool to remove interior trim pieces to protect from marring the
surface. |
| ŌĆó |
Put on gloves to protect
your hands. |
| ŌĆó |
Take care not to bend
or scratch the cover and other parts. |
|
| 1. |
Remove the trunk trim. (Refer
to the BD group - "Trunk Trim")
|
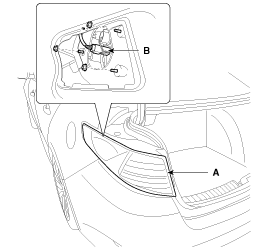
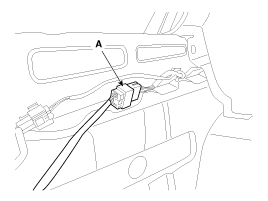
| 2. |
Disconnect the connector (B),
and then loosen the rear combination lamp mounting nuts. |
| 3. |
Remove the rear combination lamp
(A).
|
| 4. |
After loosening the rear bumper
side's mounting clips and screw, then disconnect the side's.
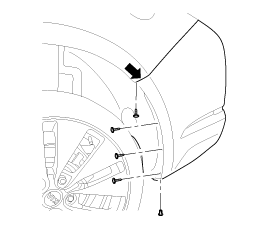
|
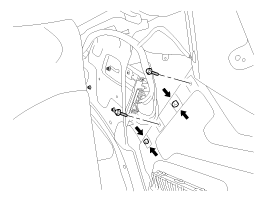
| 5. |
Loosen the trunk inner mounting
bolts.
| ŌĆó
|
Push on hook
in the trunk as below arrow. |
|
|
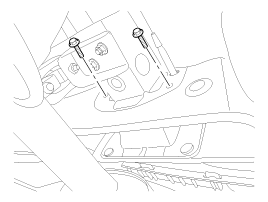
| 6. |
Loosen the mounting bolts.
|
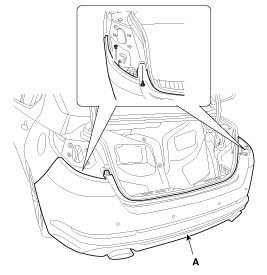
| 7. |
Disconnect the rear bumper main
connector (A).
|
| 8. |
After loosening the mounting
screw and clip, then remove the rear bumper cover (A).
|
| 9. |
Installation is the reverse of
removal.
| ŌĆó
|
Replace any damaged
clips. |
| ŌĆó
|
Make sure the
connector is plugged in properly. |
|
|
1. Rear bumper cover
2. Rear reflector
3. Rear bumper lower cover
4. Rear bumper energy absorber
5. Wiring harness
6. Rear bumper beam assembly
...
See also:
Replacement
Repair tire after using the Tire Mobility
Kit (TMK)
When the TPMS warning lamp OFF
1.
Remove the TMK repaired tire,
wheel and TPMS sensor.(Refer to "Tire removal&quo ...
Inspection
1.
Turn the ignition switch OFF.
2.
Disconnect the PCSV connector.
3.
Measure resistance between the PCSV terminals 1 and
2.
4.
...
Power Door Lock Actuators. Repair procedures
Inspection
Front Door Lock Actuator Inspection
1.
Remove the front door trim.
(Refer to the BD group - "Front door")
2.
Remove the front door module.
...
 Components(2)
