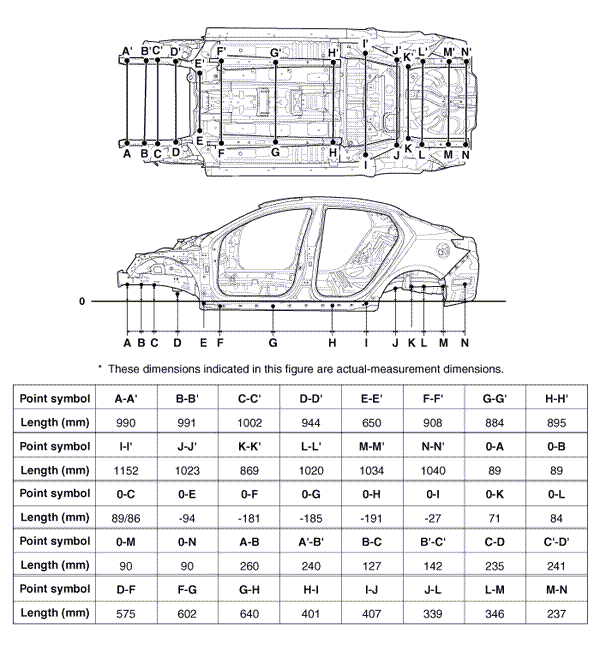
 Kia Optima: Projected Dimensions
|
|
|
|
|
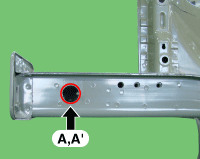
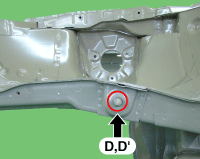
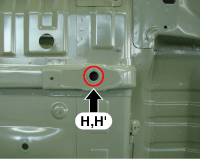
Front side member tooling hole (Ø25) |
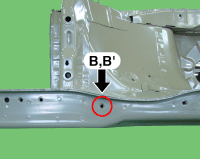
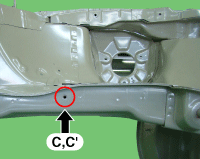
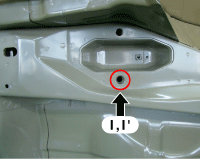
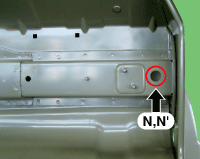
Side cover mounting hole (Ø9) |
Side cover mounting hole (Ø9) |
|
|
|
|
|
Front subframe mounting bolt |
Front subframe mounting hole (Ø16.5) |
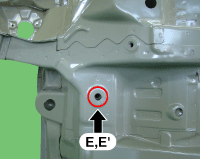
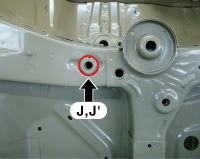
Front side rear member tooling hole (Ø25) |
|
|
|
|
|
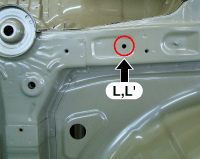
Front side rear member tooling hole (Ø14.5) |
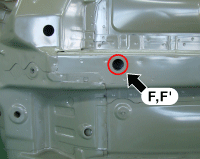
Center floor side panel tooling hole (Ø19.5) |
Rear trailing arm mounting hole (Ø19) |
|
|
|
|
|
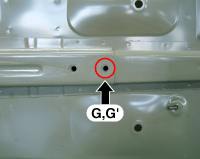
Rear subframe mounting hole (Ø16) |
Rear subframe mounting hole (Ø16) |
Fuel filler-neck assembly bracket mounting hole (Ø8) |

|
|
|
|
|
Rear floor side member tooling hole (Ø10) |
Rear floor side member tooling hole (Ø20) |
|


 Actual-Measurement Dimensions
Front side member tooling hole (Ø25)
Side cover mounting hole (Ø9)
Side cover mounting ...
See also:
Replacement
Trunk Lid Assembly Replacement
ŌĆó
When removing and installing
the trunk lid, an assistant is necessary.
...
Heated Steering wheel. Description and Operation
Description
The heated steering wheel features an internal heating element that maintains the
steering wheel temperature to a consistent level during cold seasons. A heater element
has been integ ...
Moving Up a Steep Grade From a Standing Start
To move up a steep grade from a standing start, depress the brake pedal, shift
the shift lever to D (Drive). Select the appropriate gear depending on load weight
and steepness of the grade, and re ...
Categories
Kia Optima Manuals
- Kia Optima DL3 2019-2026 Owners Manual
- Kia Optima DL3 2019-2026 Service and Repair Manual
- Kia Optima TF 2011-{2019} Owners Manual
- Kia Optima TF 2011-2026 Service Manual
- Kia Optima MS/Magentis 2000-2005 Owners Manual
