 Kia Optima: Lift And Support Points
|
When heavy rear components such as suspension, fuel tank, spare tire,
tailgate and trunk lid are to be removed, place additional weight in the
luggage area before hoisting. When substantial weight is removed from the
rear of the vehicle, the center of gravity may change and can cause the
vehicle to tip forward on the hoist. |
| ŌĆó
|
Since each tire/wheel
assembly weights approximately 14kg (30lbs), placing the front wheels
in the luggage area can assist with the weight distribution. |
| ŌĆó
|
Use the same support
points to support the vehicle on safety stands. |
|
|
1. |
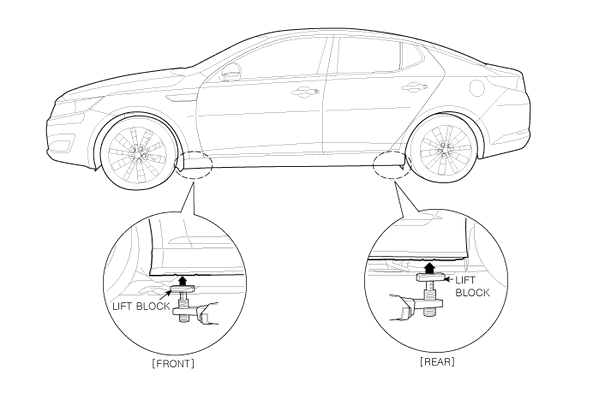
Place the lift blocks under
the support points as shown in the illustration. |
|
2. |
Raise the hoist a few inches
(centimeters) and rock the vehicle to be sure it is firmly supported. |
|
3. |
Raise the hoist to full
height to inspect the lift points for secure support.

|
|
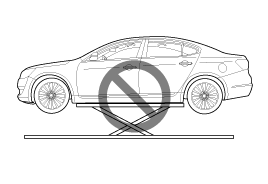
Using scissors lift

Using a scissors lift may cause damage of the side out seal molding
panel because the lift point is located higher than side out seal molding
panel.

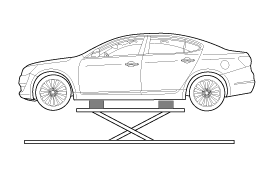
Place wooden or rubber blocks (more than 50mm (1.9685in) in height)
between lift and vehicle lift point to prevent damage of the side out seal
molding panel.

|
Warning / Caution Label (Cont'd)
A.
Keep lighted cigarettes and all other flames or sparks away from the
battery.
B.
Wear eye protection when charg ...
If the vehicle needs to be towed, call a professional towing service. Never
tow vehicle with just a rope or chain. It is very dangerous. ...
 Kia Optima: Lift And Support Points
 Battery Caution Label Description
 Towing


