 Kia Optima: Inspection
| 1. |
Troubleshooting for Speaker
| (1) |
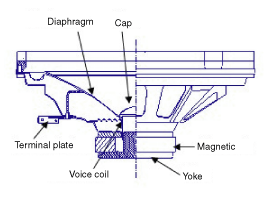
Basic inspection of speaker
Inspect the sound from speaker after verifying that the speaker
mounting screws are removed and the wiring connector is connected
to remove any possible vibration transmitted from body trims and
surrounding parts.
|
| (2) |
Case Troubleshooting
No.
|
Case
|
Inspection/Remedy
|
1
|
Trembling sound
|
|
1. |
Before
replacing the speaker, inspect that the mounting
screw is installed normally. |
|
2. |
After
re-installing the speaker, verify that no trembling
sound is heard. |
|
3. |
When
hearing a trembling sound again, replace the speaker
with new one. |
|
2
|
Noise
|
|
1. |
Check
if the wiring connector is connected normally. If
not, reconnect the wiring connector. |
|
2. |
In case
of radio static, check if there is a noise from
CD. |
|
3. |
If a
noise is heard with the radio and CD on, replace
the speaker with new one. |
|
In case there is only radio static, this causes
from poor radio reception. Thus the speaker needs
no repair and replacement. |
|
3
|
Speaker
in operative
|
Inspection of the wiring connection between the battery
and the speaker
|
1. |
Before
replacing the speaker, inspect the wiring connection
between the battery and the speaker is normal. |
|
2. |
Check
the supply power to the speaker and the resistance,
then inspect the sound quality. ■ Specified impedance
: 2 ~ 4Ω
|
|
3. |
If the
speaker works poorly, replace it with new one. |
|
When handling the speakers:
|
- |
Do not
damage the speaker with impact, like dropping or
throwing it. |
|
- |
Be careful
not to drop water and oil on the speakers. |
|
- |
Caution
during handling of speaker because the material
of diaphragm is paper which is easily torn by impact
or external force. |
|
- |
Modifying
the audio system may cause damage the speakers.
If this is the case, the speakers are not covered
by the manufacturer's warranty. |
|
|
|
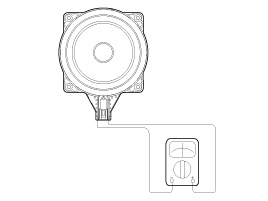
Front Speaker
1.
Remove the front door trim panel
and speaker connector.(Refer to the BD group - "Front door")
2.
Remove the front speaker (A)
after loos ...
See also:
Sunglass holder
To open the sunglass holder, press the cover and the holder will slowly open.
Place your sunglasses with the lenses facing out.
To close the sunglass holder, push it up.
WARNING
Do not keep ...
Talking on the Phone
When talking on the phone, ŌĆ£Active CallŌĆØ message and the other partyŌĆÖs phone
number (if available) are displayed on the audio.
ŌĆó To Finish a Call
- Press button on the steering wheel.
&# ...
Proper Use and Care of the Safety Belt System
To ensure that the safety belts provide the maximum protection, please follow
these instructions:
Use the belts at all times - even on short trips.
If the safety belt is twisted, straighten it ...

 Removal