 Kia Optima: Replacement
| 1. |
Loosen the wheel nuts slightly.
Raise the vehicle, and make sure it is securely supported.
|
| 2. |
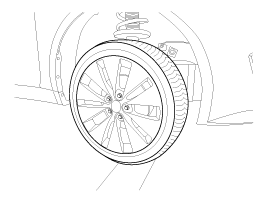
Remove wheel nuts, front wheel
and tire from front hub.
Tightening torque:88.2
~ 107.8 N.m (9.0 ~ 11.0 kgf.m, 65.0 ~ 79.5 lb-ft)
|
|
Be careful not to damage to the wheel nuts when removing the front
wheel and tire. |
|
| 3. |
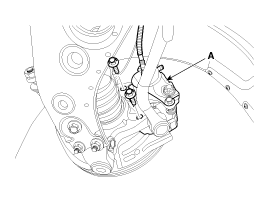
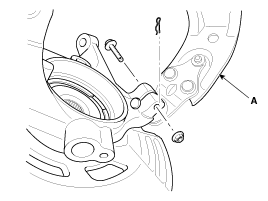
Remove the brake caliper mounting
bolts, and then hold the brake caliper assembly (A) with wire.
Tightening torque:78.4
~ 98.0 N.m (8.0 ~ 10.0 kgf.m, 57.8 ~ 72.3 lb-ft)
|
|
| 4. |
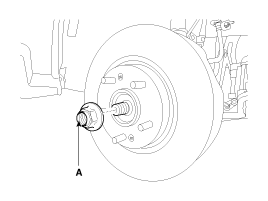
Remove driveshaft nut (A) from
the front hub when applying the brake.
Tightening torque:215.7
~ 254.9 N.m (22.0 ~ 26.0 kgf.m, 159.1 ~ 188.0 lb-ft)
|
|
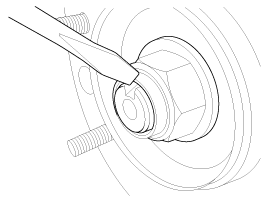
After installation lock nut, stake the lock nut using a chisel and
hammer as shown in the illustration below. |
|
| 5. |
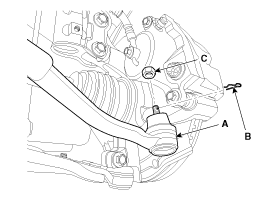
Remove the tie rod end ball joint
(A) from the knuckle.
| (1) |
Remove the split pin
(C). |
| (2) |
Remove the castle nut
(B).
Tightening torque:
34.3 ~ 44.0 N.m (3.5 ~ 4.5 kgf.m, 25.3 ~ 32.5 lb-ft)
|
|
|
| 6. |
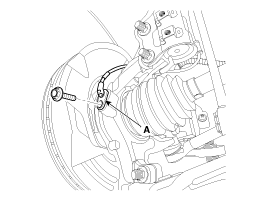
Loosen the mount bolt and then
remove the wheel speed sensor (A) from knuckle.
Tightening torque:6.8 ~
10.7 N.m (0.7 ~ 1.1 kgf.m, 5.0 ~ 7.9 lb-ft)
|
|
| 7. |
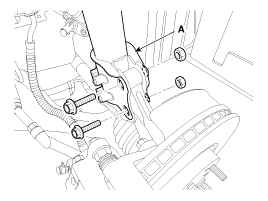
Loosen the bolt & nut and then
remove the knuckle from the strut assembly (A).
Tightening torque:156.9
~ 176.5N.m (16.0 ~ 18.0kgf.m, 115.7 ~ 130.2lb-ft)
|
|
| 8. |
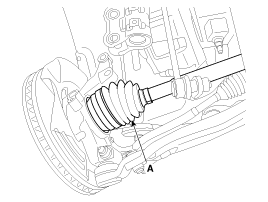
Disconnect the driveshaft (A)
from the front hub assembly.
|
| 9. |
Loosen the bolt & nut and then
remove the lower arm (A).
Tightening torque:98.0
~ 117.6 N.m (10.0 ~ 12.0 kgf.m, 72.3 ~ 86.7 lb-ft)
|
|
| 10. |
Install in the reverse order
of removal. |
1.
Check the hub for cracks and
the splines for wear.
2.
Check the brake disc for scoring
and damage.
3.
Check the knuckle for cracks
4. ...
 Kia Optima: Replacement
 Inspection


