 Kia Optima: Replacement
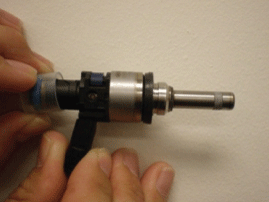
The injector combustion seal should be replaced new one to prevent leakage after removing the injector.
| 1. |
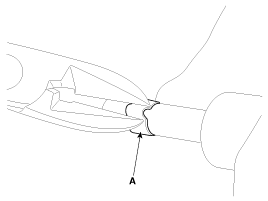
Remove the combustion seal (A) with a wire cutter.
|
| 2. |
Before the assembly of the sealing ring the groove
must be cleaned using a clean cloth.
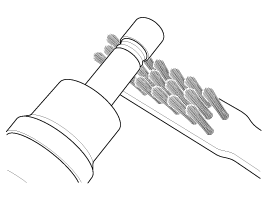
Any coking of the injector sealing surface must be carefully removed with a brass-wire brush.
|
| 3. |
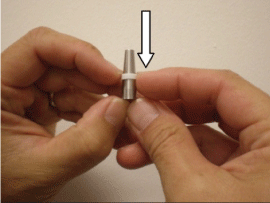
Place the combustion seal on the coneand pull downward
on the seal as indicatedin the photo.
|
| 4. |
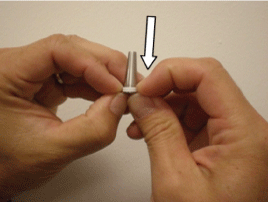
Pull the seal downward until it is near thebottom
of the cone as shown in the photo.
|
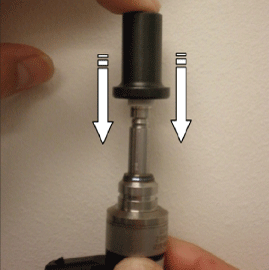
| 5. |
Place the cone (with seal) on the end ofthe injector. Place the sizing tool (SST No.: 09353-2B000) overthe cone. Make sure the tool flange istoward the seal as shown. Press down on the tool to work the sealover the injector and into the groove.
|
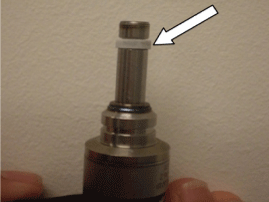
| 6. |
Because the seal will stretch as it goesover the
end of the injector, it will be a bitoversized after installation. By letting the injector and seal set for a fewminutes, the seal may reduce in size. Inspect the seal for damage before continuing.
|
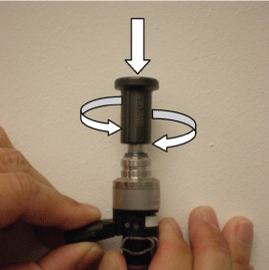
| 7. |
Place the resizing tool (flange up) over theseal.
Twist the tool slightly while pushingdown over the seal. This should
reduce thesize of the seal.
|
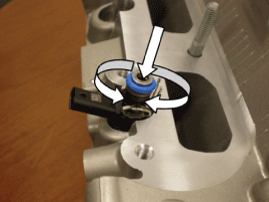
| 8. |
Place injector into the head as shown.
|

| 9. |
Twist slightly while pressing the injectorinto position
in the head. This should complete the resizing of theseal. Remove the injector and inspect the sealbefore completing the injector installation process.
|
| 10. |
If the injector comes with a protective steelwasher
held in place by a spring clip; bothwill have to be removed before installation.
|

| 11. |
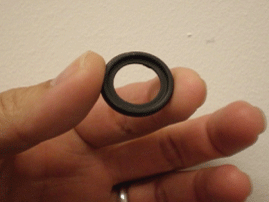
Install the Washer Seal onto injector withthe rubber
side (stepped) toward theinjector.
|
| 12. |
The stepped rubber side of the seal goes towards
the injector.
|
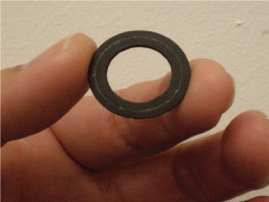
| 13. |
The flat washer side of the seal goes towards the
head.
|
 Installation
Do not reuse the injector retaining clip, O-ring,
backup ring, washer seal or combustion sealring. Once an injector is
removed, the f ...
 Purge Control Solenoid Valve (PCSV). Description and Operation
Description
Purge Control Solenoid Valve (PCSV) is installed on the surge
tank and controls the passage between the canister and the intake manifold.
It is a solenoid valve and is open when the ...
See also:
ESC (Electronic stability control)
The Electronic Stability control (ESC) system is designed to stabilize the vehicle
during cornering maneuvers. ESC checks where you are steering and where the vehicle
is actually going. ESC appl ...
Disassembly
ŌĆó
Do not disassemble the
BJ assembly.
ŌĆó
Special grease must be
applied to t ...
Inspection
1.
Turn ignition switch OFF.
2.
Disconnect the oil temperature
sensor connector.
3.
Measure resistance between sensor
signal terminal and sensor g ...
Categories
Kia Optima Manuals
- Kia Optima DL3 2019-2026 Owners Manual
- Kia Optima DL3 2019-2026 Service and Repair Manual
- Kia Optima TF 2011-{2019} Owners Manual
- Kia Optima TF 2011-2026 Service Manual
- Kia Optima MS/Magentis 2000-2005 Owners Manual
