 Kia Optima: Removal
Brake Booster
| 1. |
Turn ignition switch OFF and
disconnect the negative (-) battery cable. |
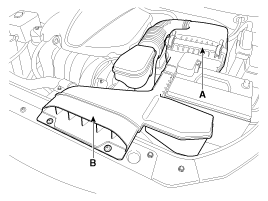
| 2. |
Remove the air duct (B) and air
cleaner assembly (A).
|
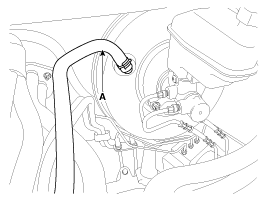
| 3. |
Disconnect the vacuum hose (A)
from the brake booster.
|
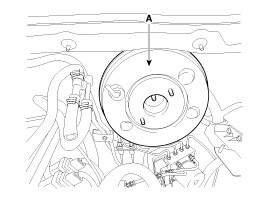
| 4. |
Remove the master cylinder. (Refer
to Master Cylinder) |
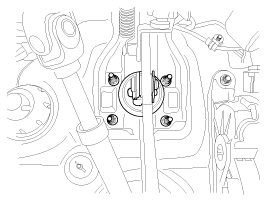
| 5. |
Remove the snap pin (A) and clevis
pin (B).

|
| 6. |
Remove the mounting nuts.
Tightening torque:12.7
~ 15.7 N.m (1.3 ~ 1.6 kgf.m, 9.4 ~ 11.6 lb-ft)
|
|
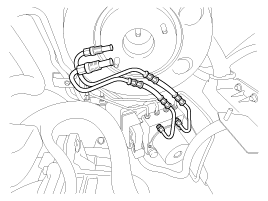
| 7. |
Remove the brake tube.
|
| 8. |
Remove the brake booster.
|
Vacuum Pump
| 1. |
Turn ignition switch OFF. |
| 2. |
Remove the under covers (A, B).
Tightening torque:9.8 ~
11.8 N.m (1.0 ~ 1.2 kgf.m, 7.2 ~ 8.7 lb-ft)
|

|
When removing the under cover (B), unfasten the mounting bracket
bolts and then remove the under cover and mounting bracket assembly.
|
|
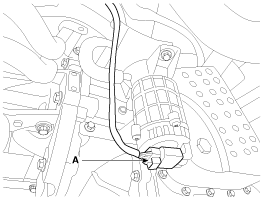
| 3. |
Disconnect the vacuum pump connector
(A).
|
| 4. |
Disconnect the vacuum hose (A).
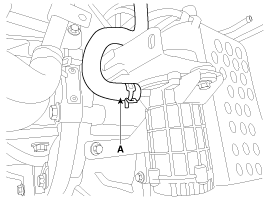
|
| 5. |
Loosen the vacuum pump bracket
bolts (A), and then remove vacuum pump and bracket.
Tightening torque:19.6
~ 29.4 N.m (2.0 ~ 3.0 kgf.m, 14.5 ~ 21.7 lb-ft)
|
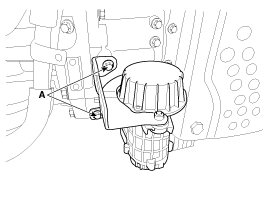
|
| 6. |
Remove the 2 bolts, and then
remove the bracket from vacuum pump. |
For simple checking of the brake booster operation, carry out the following tests.
1.
Run the engine for one or two
minutes, and then stop it. If the pedal depresses fully the first time ...
Brake Booster
1.
Inspect the check valve in the
vacuum hose, intensifier and the connecting section.
...
See also:
Interior and Exterior Overview
...
Using iPodôÛ
✽ NOTICE FOR USING THE iPodôÛ DEVICE
Some iPodôÛ models might not support the communication protocol and the
files will not be played. Supported iPodôÛ models: - iPodôÛ Mini - iPodôÛ 4th ...
Transmitter Code Registration (Using GDS)
1.
Connect the DLC cable of GDS
to the data link connector (16 pins) in driver side crash pad lower panel,
turn the power on GDS.
2.
Select the vehicle model ...
 Brake Booster Operating Test
 Inspection