 Kia Optima: Automatic heating and air conditioning
The automatic climate control system is controlled by simply setting the desired temperature.
The Full Automatic Temperature Control (FATC) system automatically controls the heating and cooling system as follows;
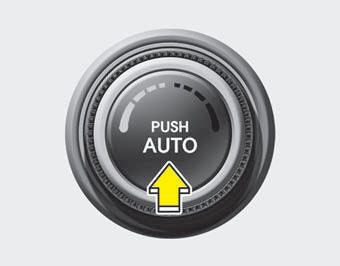
1. Press the AUTO button. The modes, fan speeds, air intake and air-conditioning will be controlled automatically by setting the temperature.
2. Set the temperature control knob to the desired temperature.
If the temperature is set to the lowest setting (Lo), the air conditioning system will operate continuously.
3. To turn the automatic operation off, select any button or switch of the following:
ŌĆó Mode selection button
ŌĆó Air conditioning button
ŌĆó Front windshield defroster
button
ŌĆó Air intake control button
ŌĆó Fan speed control switch
The selected function will be controlled manually while other functions operate automatically.
For your convenience and to improve the effectiveness of the climate control, use the AUTO button and set the temperature to 23┬░C (73┬░F).
✽ NOTICE
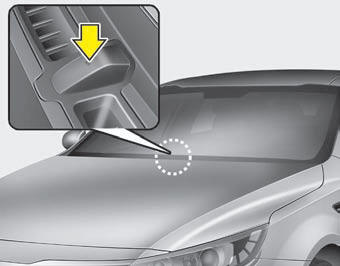
Never place anything over the sensor located on the instrument panel to ensure better control of the heating and cooling system.
 Automatic climate control system
Type A
Type B
1. Fan speed control switch 2. DriverŌĆÖs temperature control knob 3. Outside
air position button 4. Air conditioning button 5. Front windshield defroster
button 6. Mode select ...
 Manual heating and air conditioning
The heating and cooling system can be controlled manually by pushing buttons
other than the AUTO button. In this case, the system works sequentially according
to the order of buttons selected.
1. ...
See also:
Components(2)
1. Front bumper cover
2. Front bumper lip assembly
3. Radiator grill
4. Front bumper lower side molding
5. Front fog lamp
6. Wiring harness assembly
7. Front b ...
Noise and smoke
When the air bags inflate, they make a loud noise and they leave smoke and powder
in the air inside of the vehicle. This is normal and is a result of the ignition
of the air bag inflator. After th ...
Pre-tensioner Seat Belt
Your vehicle is equipped with driverŌĆÖs and front passengerŌĆÖs pre-tensioner seat
belts. The purpose of the pre-tensioner is to make sure that the seat belts fit
tightly against the occupantŌĆ ...
Categories
Kia Optima Manuals
- Kia Optima DL3 2019-2026 Owners Manual
- Kia Optima DL3 2019-2026 Service and Repair Manual
- Kia Optima TF 2011-{2019} Owners Manual
- Kia Optima TF 2011-2026 Service Manual
- Kia Optima MS/Magentis 2000-2005 Owners Manual
