 Kia Optima: Trailing Arm. Repair procedures
Replacement
| 1. |
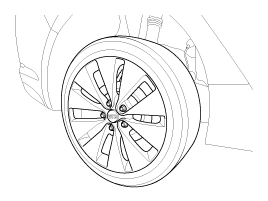
Remove the rear wheel & tire.
Tightening torque:88.3
~ 107.9N.m (9.0 ~ 11.0kgf.m, 65.1 ~ 79.6lb-ft)
|
|
Be careful not to damage the hub bolts when removing the rear wheel
& tire. |
|
| 2. |
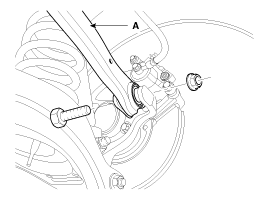
Loosen the bolt & nut and then
remove the rear upper arm (A) from the rear axle.
Tightening torque:137.3
~ 156.9N.m(14.0 ~ 16.0kgf.m, 101.3 ~ 115.7lb-ft)
|
|
| 3. |
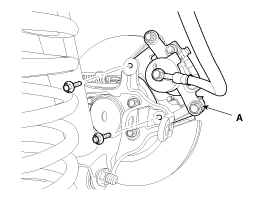
Loosen the bolt and then remove
the rear caliper (A).
Tightening torque:49.0
~ 58.8N.m (5.0 ~ 6.0kgf.m, 36.2 ~ 43.4lb-ft)
|
|
| 4. |
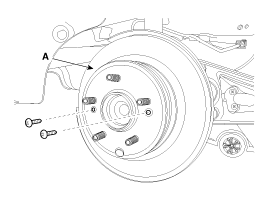
Loosen the screw and then remove
the rear disc (A).
|
| 5. |
Disconnect the parking brake
cable (A) from the rear brake assembly. (Refer to BR group - "Parking
brake system)
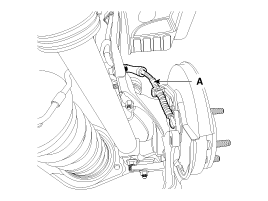
|
| 6. |
Loosen the parking brake cable
bracket bolt (A) & height sensor bracket bolt (B).
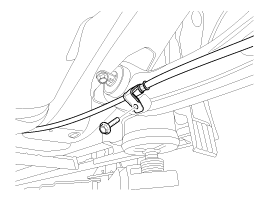
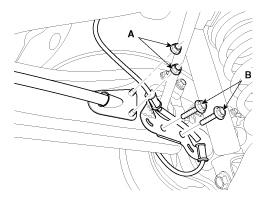
|
| 7. |
Loosen the mounting bolt and
then remove the trailing arm (A) from the rear axle.
Tightening torque:44.1
~ 53.9N.m(4.5 ~ 5.5kgf.m, 32.5 ~ 39.8lb-ft)
|
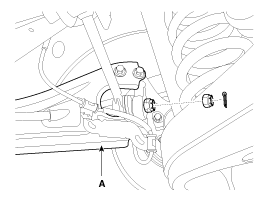
|
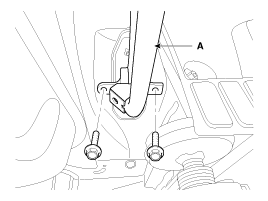
| 8. |
Loosen the mounting bolt and
then remove the trailing arm (A) from the frame.
Tightening torque:98.1
~ 117.7N.m(10.0 ~ 12.0kgf.m, 72.3 ~ 86.8lb-ft)
|
|
| 9. |
Installation is the reverse of
removal. |
1.
Check the bushing for wear and
deterioration.
2.
Check for all bolts and nut.
...
Replacement
1.
Remove the rear wheel & tire.
Tightening torque:88.3
~ 107.9N.m(9.0 ~ 11.0kgf.m, 65.1 ~ 79.6lb-ft)
...
See also:
System Operation
Ventilation
1. Set the mode selection switch to the
position.
2. Set the air intake control switch to the outside air position.
3. Set the temperature control knob to the desired position.
4. Se ...
To decrease the cruising speed
Follow either of these procedures:
Move the lever (1) down (to SET-) and hold it. Your vehicle will gradually
slow down. Release the lever at the speed you want to maintain.
Move the lever ...
Removal
1.
Disconnect the negative (-) battery
terminal.
2.
Remove the steering wheel.
(Refer to the ST group - "Steering column & shaft")
3.
...
 Kia Optima: Trailing Arm. Repair procedures
 Inspection
 Rear Cross Member. Repair procedures


