 Kia Optima: Removal and Installation
|
1. |
Disconnect the terminals from the battery.
Tightening torque
:(+) terminal (A) : 7.8 ~ 9.8N.m (0.8 ~ 1.0kgf.m,
5.8 ~ 7.2lb-ft)
(-) terminal (B) : 4.0 ~ 6.0N.m (0.4 ~ 0.6kgf.m,
3.0 ~ 4.4lb-ft)
|
|
|
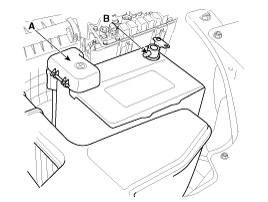
2. |
Remove the battery insulation pad (A). |
|
3. |
Remove the battery mounting bracket (B) by loosening
the mounting bolt and then remove the battery (C).
Tightening torque
:9.8 ~ 11.8N.m (1.0 ~ 1.2kgf.m, 7.2 ~ 8.7lb-ft)
|

|
|
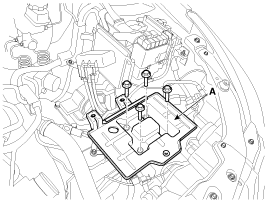
4. |
Remove the battery tray (A).
Tightening torque
:9.8 ~ 11.8N.m (1.0 ~ 1.2kgf.m, 7.2 ~ 8.7lb-ft)
|
|
|
5. |
Installation is the reverse order of removal.
|
When installing the battery, fix the mounting
bracket on the tray correctly. |
|
Battery Diagnostic Flow
Vehicle parasitic current inspection
1.
Turn the all electric devices OFF, and then turn
the ignition switch OFF.
2.
Close ...
See also:
Disassembly
ŌĆó
Do not disassemble the
BJ assembly.
ŌĆó
Special grease must be
applied to t ...
Air Bag Warning
This warning light will
remain on for approximately 6 seconds each time you turn the ignition switch ON.
If the system does not operate as described or if the light comes on while the vehicle
is ...
Components and Components Location
1. Piston ring
2. Snap ring
3. Piston
4. Connecting rod
5. Connecting rod upper bearing
6. Piston pin
7. Connecting rod lower bearing
8. Connecting ...

 Inspection