 Kia Optima: Reassembly
|
Thoroughly clean all parts to be assembled. Before installing the parts,
apply fresh engine oil to all sliding and rotating surfaces.
Replace oil seals with new ones. |
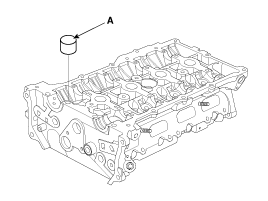
| 1. |
Install valves.
| (1) |
Using SST(09222-4A000),
push in a new oil seal.
|
Do not reuse old valve stem seals. Incorrect installation
of the seal could result in oil leakage past the valve guides.
|

|
| (2) |
Install the valve, valve
spring and spring retainer.
|
Place valve springs so that the side coated with enamel
faces toward the valve spring retainer and then installs
the retainer. |
|
| (3) |
Using the SST(09222-3K000,
09222-3K100), compress the spring and install the retainer locks.
After installing the valves, ensure that the retainer locks are
correctly in place before releasing the valve spring compressor.

|
| (4) |
Lightly tap the end of
each valve stem two or three times with the wooden handle of a hammer
to ensure proper seating of the valve and retainer lock. |
|
| 2. |
Install the MLAs after appling
engine oil. Check that the MLA rotates smoothly by hand.
|
MLA can be reinstalled in its original position. However, the
valve lash clearances must be rechecked and adjusted accordingly
before the cylinder head is installed onto the cylinder block.
Refer to General information in EM section for Valve Clearance checking
and adjustment procedure. |
|
Cylinder Head
1.
Inspect for flatness.Using
a precision straight edge and feeler gauge, measure the surface the contacting
the cylinder block and the manifolds for warpage.
...
ŌĆó
Thoroughly clean all
parts to be assembled.
ŌĆó
Always use a new head
and ...
See also:
Power window lock button
The driver can disable the power window switches on the passenger door
by pressing the power window lock switch located on the driverŌĆÖs door to the
LOCK position (pressed).
When the pow ...
Air bag warning light
The purpose of the air bag warning light in your instrument panel is to alert
you of a potential problem with your air bag - Supplemental Restraint System (SRS).
When the ignition switch is turn ...
Emission control system
The emission control system of your
vehicle is covered by a written limited
warranty. Please see the warranty information
contained in the Warranty &
Maintenance booklet in your vehicle.
...
 Inspection
 Installation