 Kia Optima: Removal
AVN Head Unit
| • |
Take care not to scratch
the center fascia panel and related parts. |
| • |
Eject all the disc before
removing the AVN head unit to prevent damaging the CD player's load
mechanism. |
|
| 1. |
Disconnect the negative (-) battery
terminal. |
| 2. |
Using a screwdriver or remover,
remove the crash pad garnish RH (A).
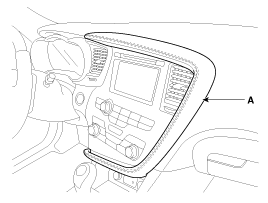
|
Apply the protective tapes to crash pad garnish and its related
parts. |
|
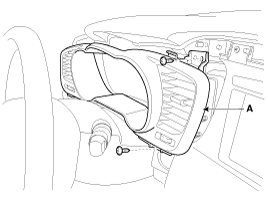
| 3. |
Using a screwdriver or remover,
remove the crash pad side cover (A).

|
| 4. |
After loosening the crash pad
lower panel mounting screws, then remove the lower panel (A).
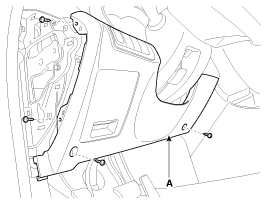
|
| 5. |
Remove the switch connector (A)
and SSB connector (B) from crash pad lower panel.

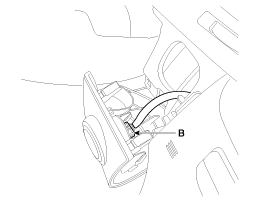
|
| 6. |
Remove the crash pad garnish
LH (A) after removing the screws.
|
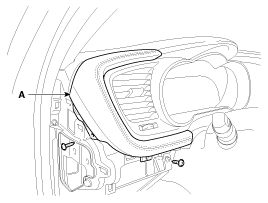
| 7. |
Remove the instrument cluster
fascia panel (A) after loosening the screws.
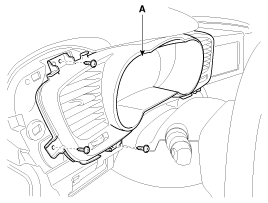
|
| 8. |
Remove the center fascia lower
panel (A) after loosening the screws.
|
| 9. |
Remove the connectors (A) and
hose (B).
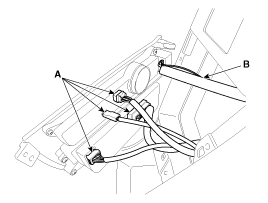
|
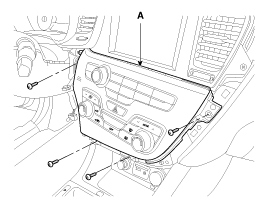
| 10. |
Remove the center fascia upper
panel (A) after loosening the screws.

|
| 11. |
Remove the AVN head unit assembly
(A) after loosening the mounting screws.

|
| 12. |
Disconnect the audio connectors
and cable (A), then remove the audio unit completely.

|
Lift the connector locking clip to the arrow direction, disconnect
the connector. When assembling, install the connector and connector
locking clip.
|
|
If the CD does not eject, do not attempt to remove it because the
audio unit may be damaged.Contact an authorized hyundai dealership
for assistance. |
|
If the CD-rom needs to be removed, follow the procedure below. |
|
Roof Antenna (GPS + SIRIUS)
| 1. |
Remove the rear roof trim.
(Refer to the BD group - "Roof trim")
|
| 2. |
Disconnect the GPS (B) cable
and SIRIUS cable (A) from the roof antenna.

|
| 3. |
Remove the roof antenna (A) after
removing a nut

|
AVN Head Unit
1.
Connect the audio unit connectors
and cables.
2.
Install the AVN head unit.
3.
Install the center fascia upper
panel.
4.
...
See also:
Replacement
1.
Remove the front wheel & tire.
Tightening torque:88.3
~ 107.9N.m(9.0 ~ 11.0kgf.m, 65.1 ~ 79.6lb-ft)
...
Head Lamps. Description and Operation
HID Head Lamp
1.
Bulb
(1)
ElementsXenon gas:
Xenon gas activates the initial reaction for rapid illuminating.
Molybdenum electrode: anode arcingMetal halide salts: ...
Disarmed stage
The system will be disarmed when:
Transmitter
- The door unlock button is pressed.
- The engine is started. (within 3 seconds)
- The ignition switch is in the “ON” position for 30 seconds or ...

 Installation