 Kia Optima: Power Window Switch. Repair procedures
Inspection
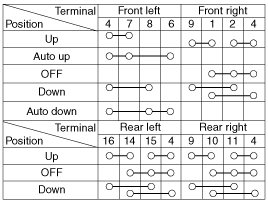
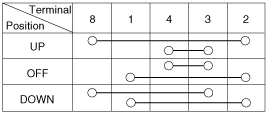
Power Window Main Switch Inspection| 1. | Disconnect the negative (-) battery terminal. |
| 2. | Remove the front door trim panel. (Refer to the BD group - "Front door") |
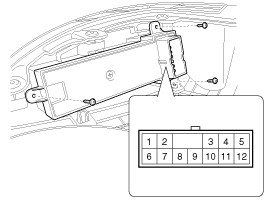
| 3. | Disconnect the connector from
the switch.
|
| 4. | Check for continuity between
the terminals in each switch position according to the table. If the continuity
condition is not normal, replace the switch.
|
| 1. | Disconnect the negative (-) battery terminal. |
| 2. | Remove the rear door trim panel.
(Refer to the BD group - "Rear door") |
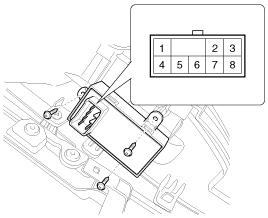
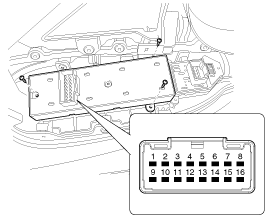
| 3. | Disconnect the 8P connector from
the switch.
|
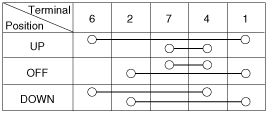
| 4. | Check for continuity between
the terminals in each switch position according to the table. If the continuity
condition is not normal, replace the switch.
|
 Power Window Relay. Repair procedures
Inspection
Diagnosis With GDS
1.
It will be able to diagnose defects
of power window with GDS quickly. GDS can operates actuator forcefully,
input/output value monitoring and self di ...
See also:
Replacement
1.
Remove the front wheel & tire.
Tightening torque :
88.3 ~ 107.9N.m (9.0 ~ 11.0kgf.m, 65.1 ~ 79.6lb-ft)
...
ESC (Electronic stability control)
The Electronic Stability control (ESC) system is designed to stabilize the vehicle
during cornering maneuvers. ESC checks where you are steering and where the vehicle
is actually going. ESC appl ...
Disassembly
1.
Disassemble the CVVT assembly
(A) and camshaft (B).
When removing the CVVT assembly bol ...

![[Auto Down]](images/books/1609/stfbe1193n.gif)
![[Safety Up/Down]](images/books/1609/stfbe1445n.gif)
